How Inventory Check-In Works from Start to Finish
Learn how inventory check-in works step by step, from inspection to documentation, to keep records accurate and operations smooth across all assets.
A new delivery arrives at the warehouse. Boxes are unloaded, paperwork is signed, and everything seems in order — until later, when someone realizes two items are missing and another is damaged. No one is sure when it happened or where the error started.
Situations like this are more common than most teams realize. When new stock, tools, or equipment aren’t checked in properly, it creates gaps in records and confusion during audits. A few missed details at the start can lead to wasted time and lost inventory down the line.
Inventory check-in helps bring order to this process. It’s a simple but structured way to confirm what’s been received, record its condition, and make sure your system matches what’s on the shelf.
Read also: IT Inventory Management: Best Practices for IT, Finance, Security
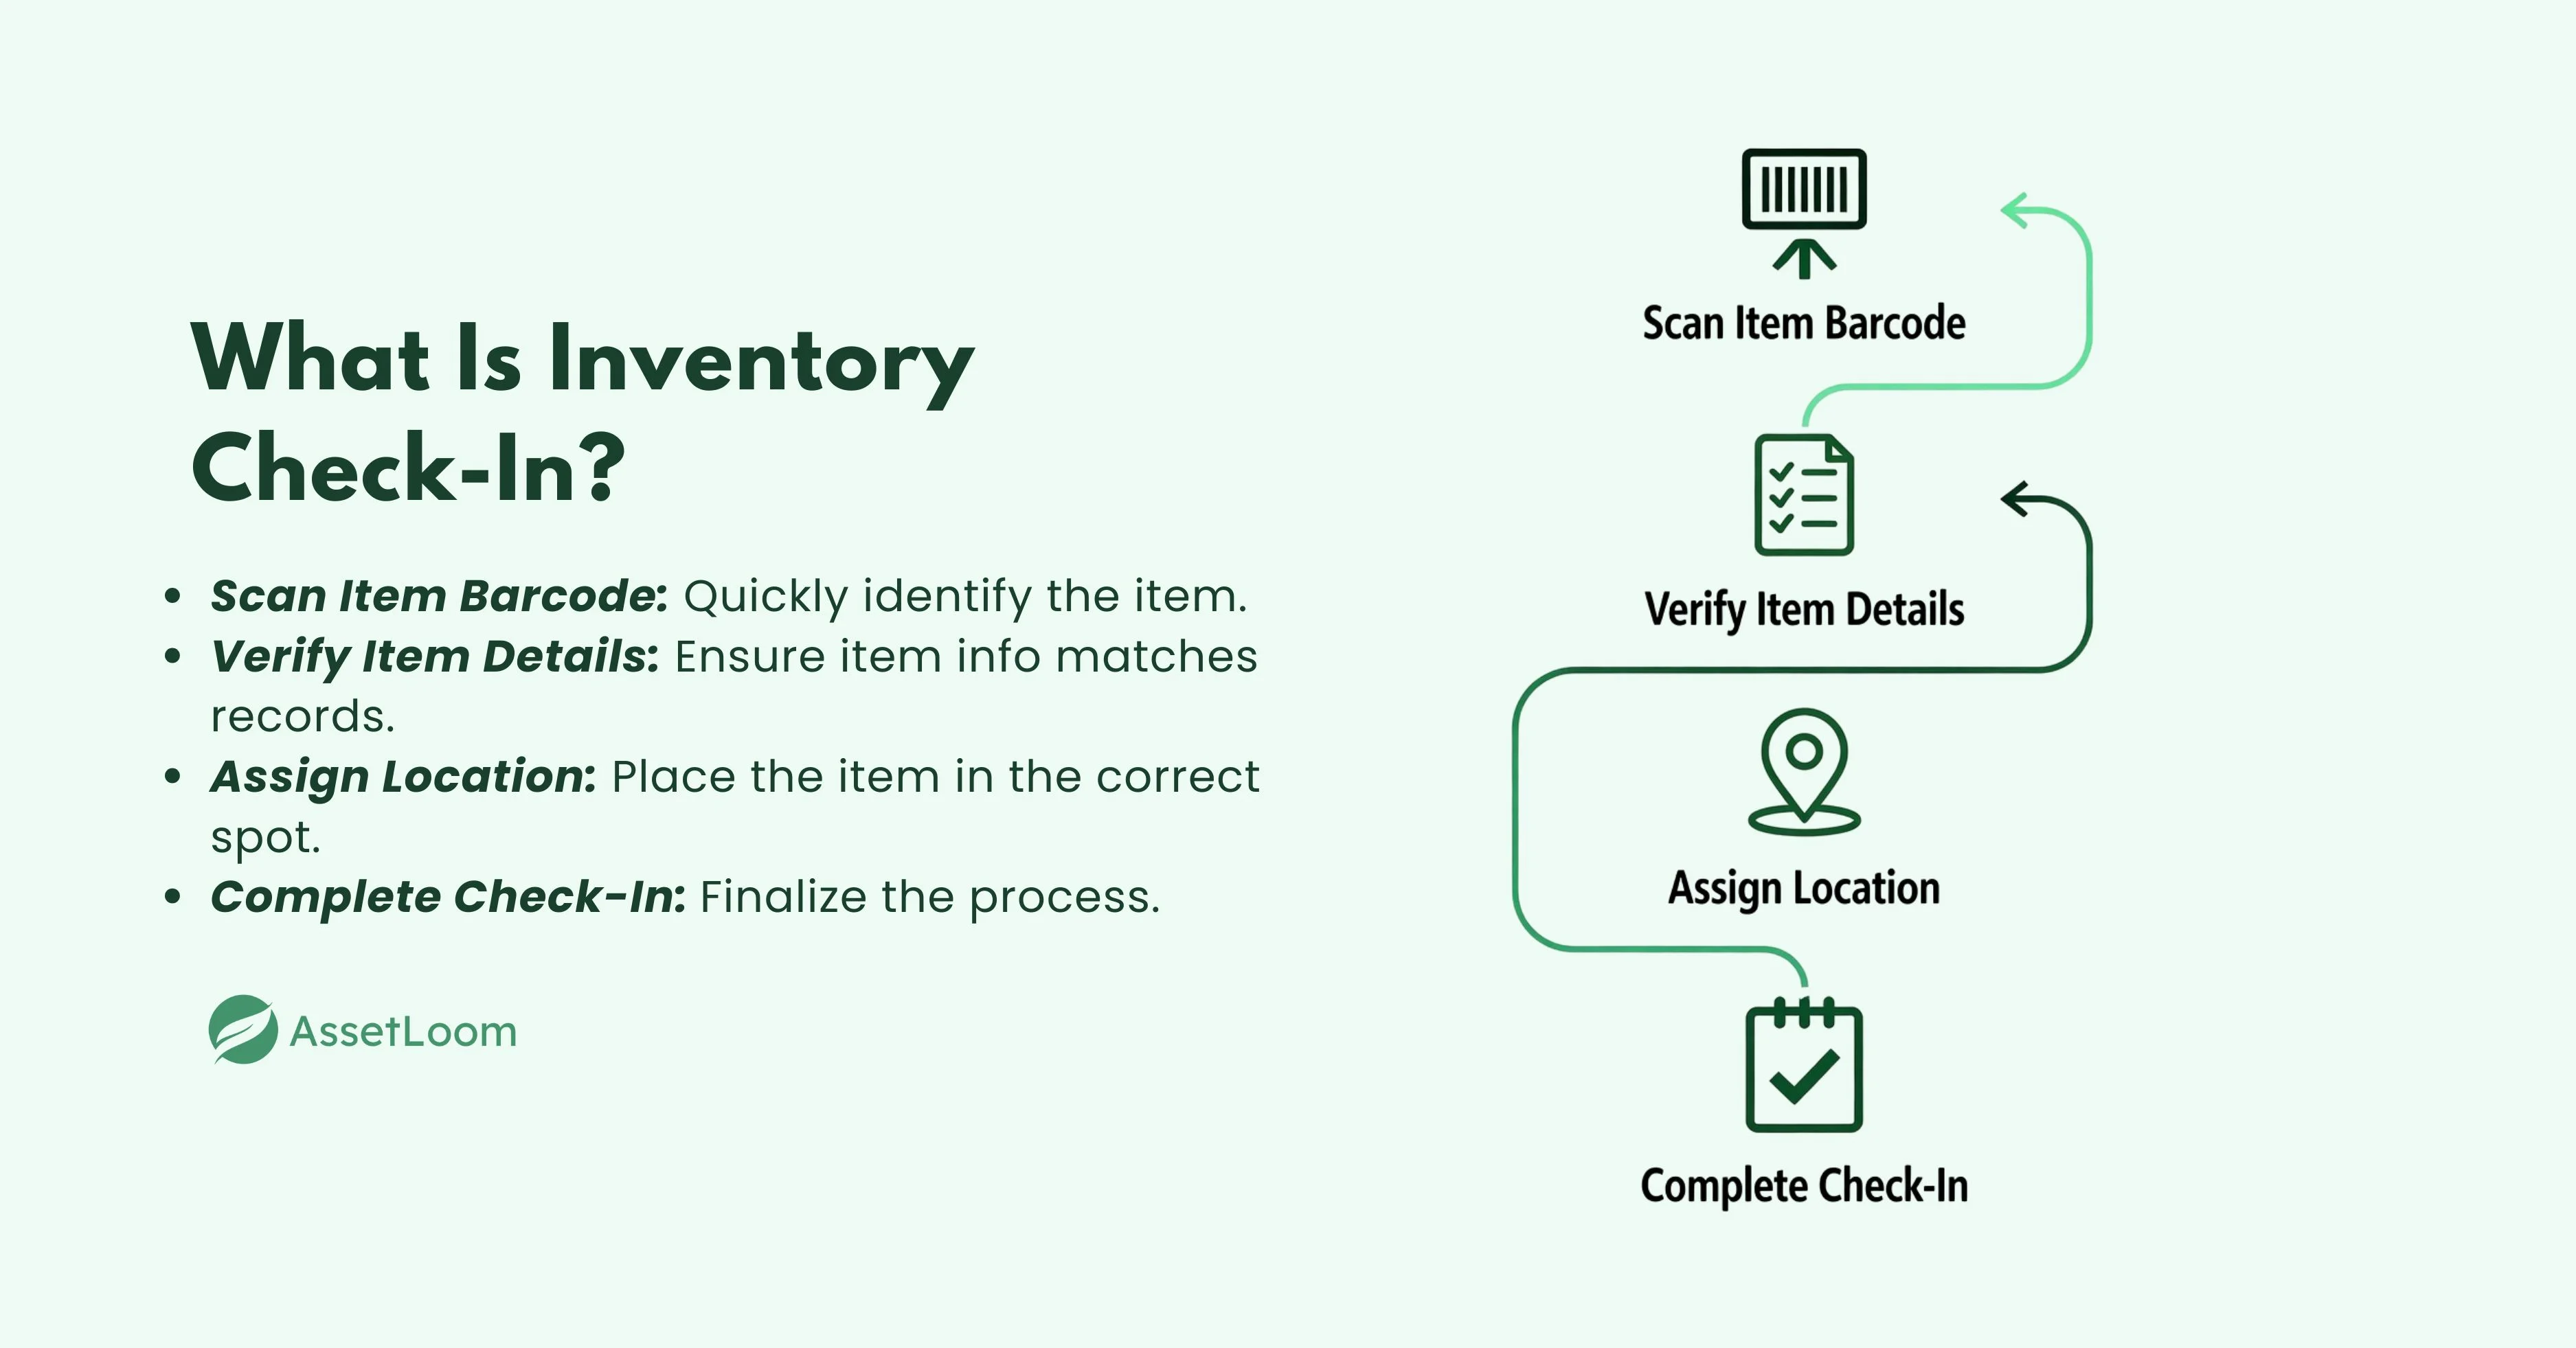
What Is Inventory Check-In?
Inventory check-in is a structured process used to record the details and condition of items at the point they enter your control — whether that’s a property being handed over to a tenant or new stock arriving at a warehouse.
The main goal is to create a reliable record that shows what exists, where it is, and what condition it’s in. This record becomes your reference point for future inspections, audits, or disputes.

In property management, an inventory check-in involves carefully documenting the contents and condition of a home or building at the start of a tenancy. The report usually includes:
- Detailed descriptions: Notes about the condition of every area and item, including walls, floors, furniture, fixtures, and appliances.
- Photographic evidence: Clear, time-stamped photos showing each room and any existing marks or wear.
- Condition ratings: A simple rating system such as “new,” “good,” or “fair” to show the state of each item.
- Appliance and fixture functionality: Confirmation that lights, plumbing, and electrical items are working correctly.
- Cleanliness level: Notes about the overall standard of cleanliness throughout the property.
- Meter readings: Recorded and photographed readings for gas, water, and electricity.
- Key information: The number of keys handed over and the condition of locks.
For businesses, inventory check-in focuses on incoming goods, materials, or equipment. It ensures that every item listed in a delivery or purchase order matches what’s physically received. A proper check-in includes:
- Verification: Matching the received goods with purchase orders or delivery notes.
- Inspection: Checking for damage, missing parts, or incorrect quantities.
- Documentation: Recording findings, often through digital systems or mobile apps.
- System updates: Adding accurate stock data into an inventory or asset management system.
- Storage or assignment: Organizing items in the right location or assigning them to users.
In both property and business settings, inventory check-in serves the same purpose — to protect accuracy, accountability, and trust. It’s the first and most important step in keeping your records honest and your operations organized.
Read also: What is An Asset Check In Check Out System?
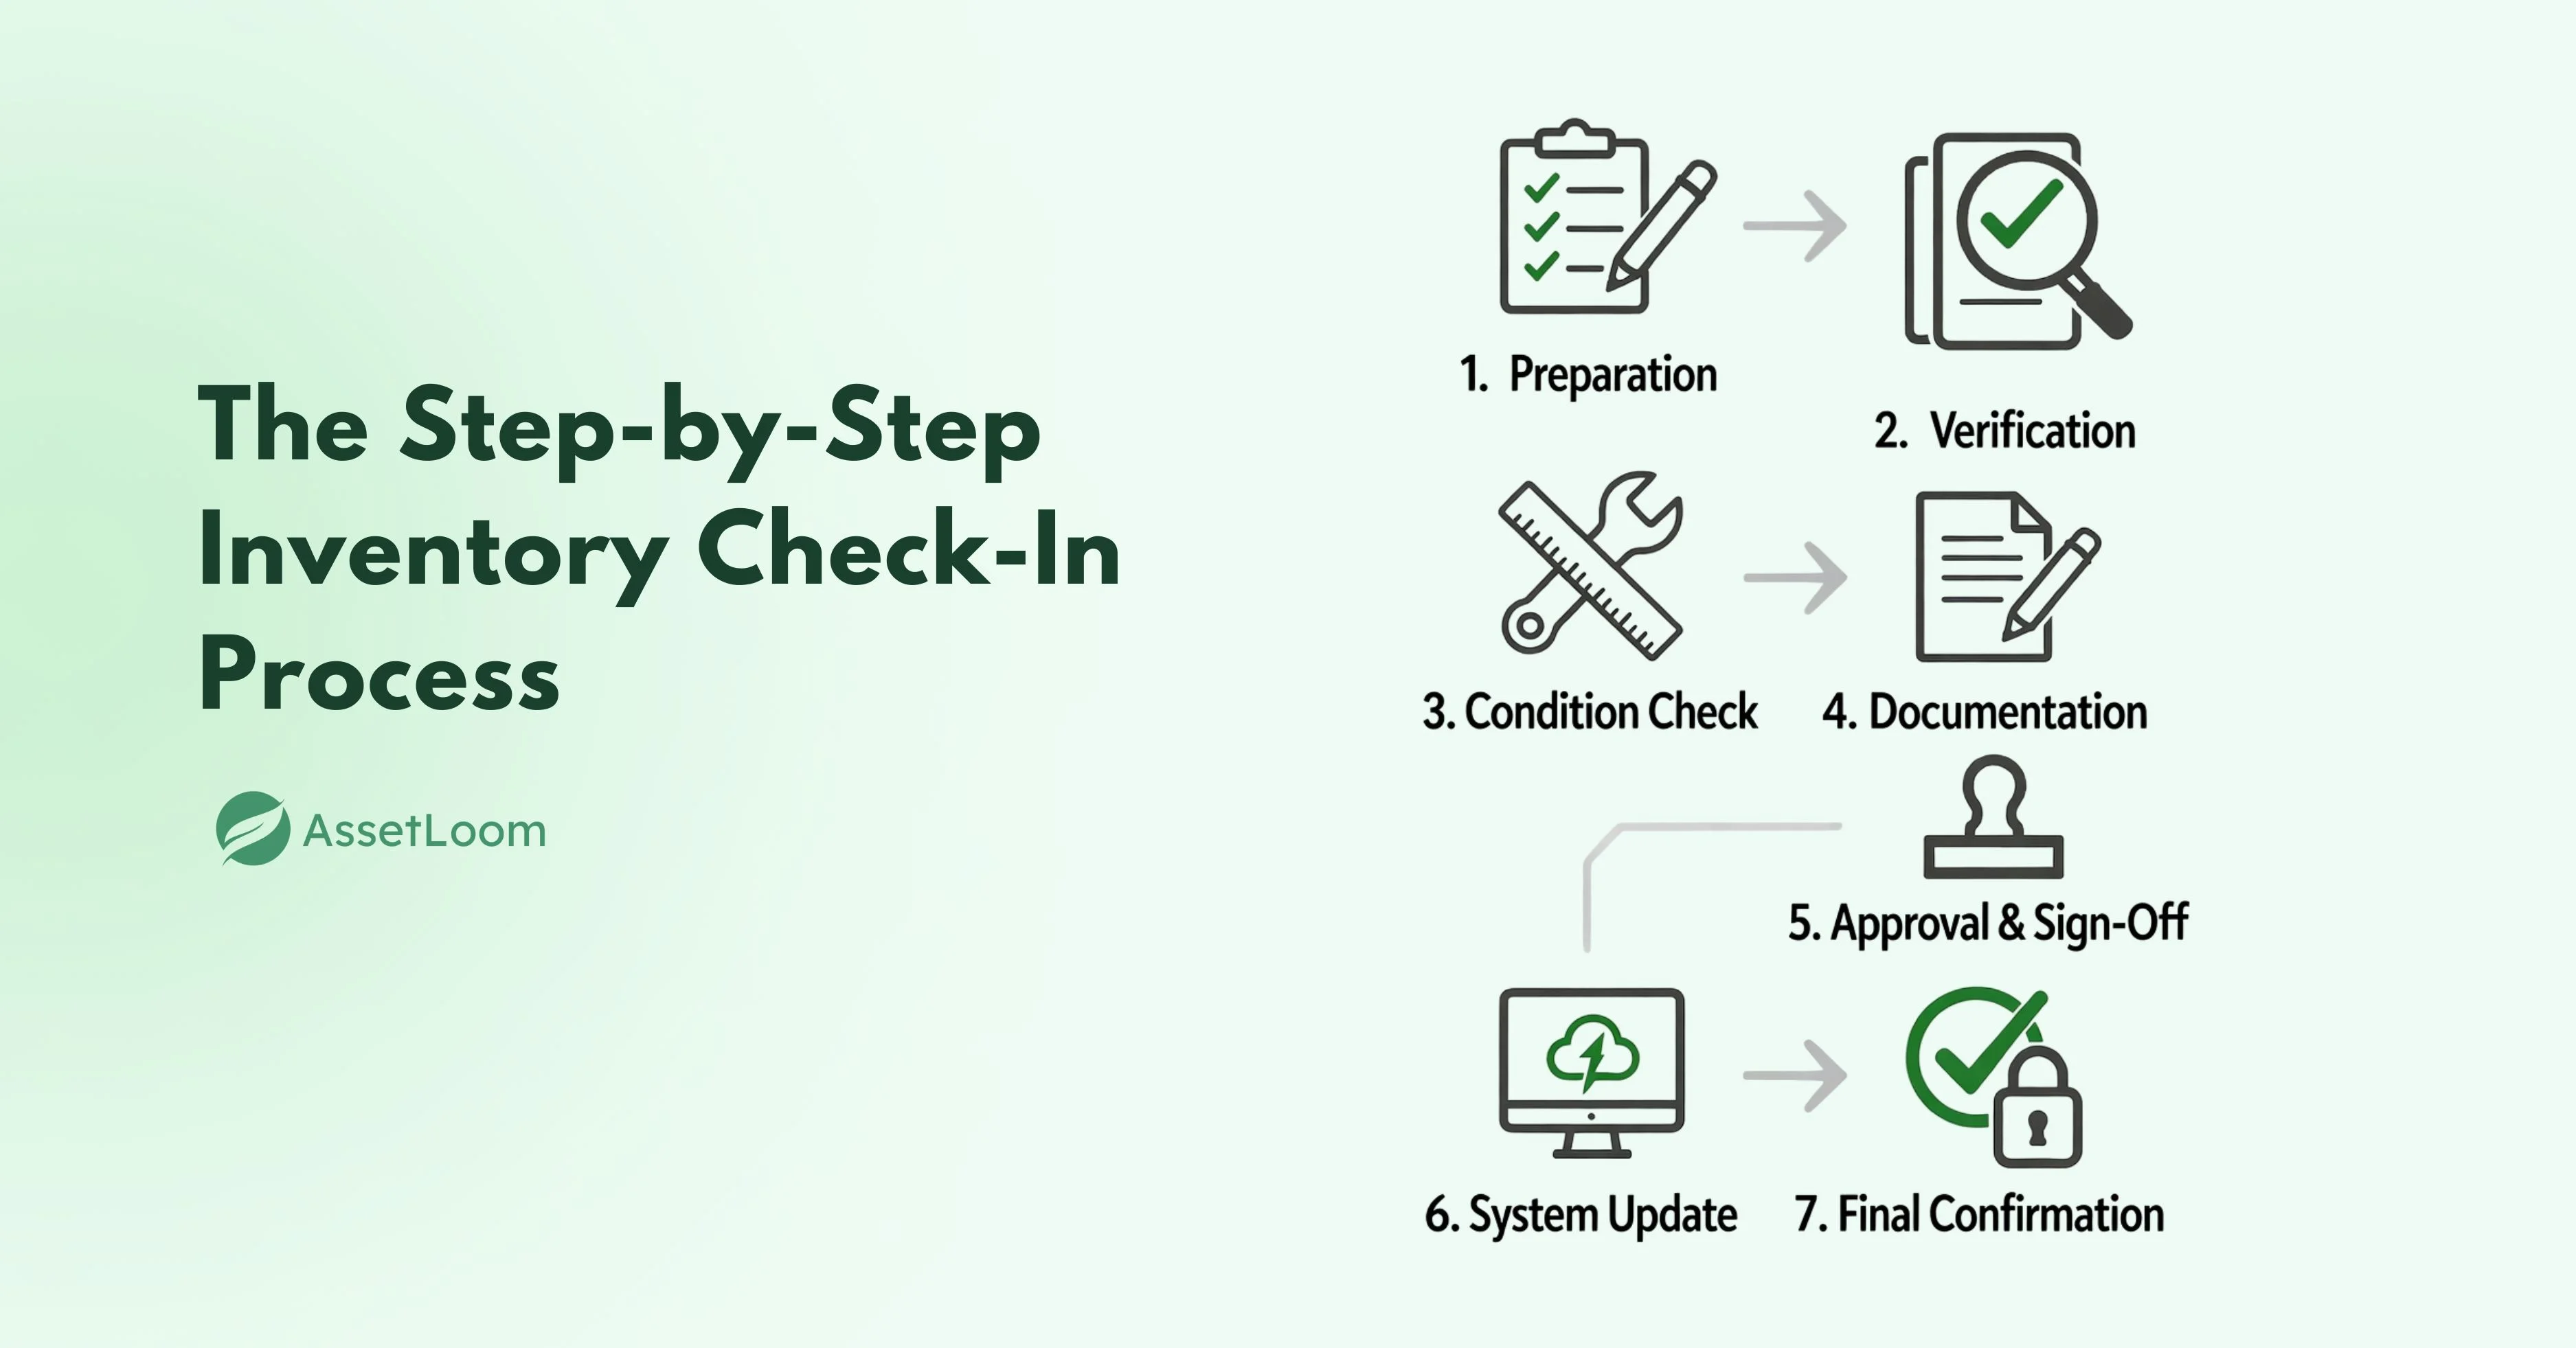
The Step-by-Step Inventory Check-In Process
A structured check-in process helps maintain order from the very beginning. It ensures that every item is properly verified, recorded, and stored so you can rely on your records later. Here’s a general overview of how it works.

1. Preparation
Every smooth check-in starts with good preparation. Before the process begins, gather all the documents and tools you’ll need. This includes purchase orders, delivery slips, supplier invoices, or property inventory templates. Having these ready helps you cross-check details quickly once the items or properties are reviewed.
Make sure your workspace or inspection area is organized. For goods or equipment, clear a spot where items can be unpacked, inspected, and tagged easily. For property check-ins, plan the order of rooms you’ll inspect and ensure good lighting for accurate photos.
It also helps to prepare your tools in advance. This might include:
- A barcode or QR scanner for tagging and identifying assets
- A camera or mobile device for taking photos
- Inventory checklists or software to record findings
- Labels or tags for marking items as checked
Good preparation prevents delays and mistakes later in the process. When everything is ready before you start, the rest of the check-in becomes faster, clearer, and more accurate.
Read also: What is a Barcode Inventory Tracking System and How Does It Work?
2. Verification
Once everything is ready, the next step is to verify what has arrived or what is being inspected. This step is about confirming that the items, equipment, or property details match the records you already have.
For goods or equipment, compare the physical items against the purchase order or delivery note. Check that the quantity, model numbers, and descriptions are correct. Make sure nothing is missing or extra. For items with serial numbers, confirm that each one matches the document.
For property check-ins, verification means confirming that all rooms, fixtures, and contents match the inventory list. Ensure that everything noted in the document actually exists in the property.
If you find any differences — such as a missing item, damaged product, or incorrect model — note it right away. Record the issue in your checklist or system so it can be reviewed and resolved later.
Verification may seem like a simple step, but it’s the foundation of accuracy. Taking time to double-check now saves hours of confusion, returns, or disputes later.
3. Condition Check
After verifying the items or property details, the next step is to inspect their condition. This step ensures that everything received or recorded is in good shape before it’s accepted or stored.
For goods or equipment, look for any visible damage such as scratches, dents, or broken parts. Check packaging for signs of mishandling during delivery. For electronic items, do a quick test if possible to confirm that they’re working as expected.
For property check-ins, this means walking through each room and checking walls, floors, fixtures, and furniture. Note any marks, stains, or wear that already exist. Take clear photos as visual proof, especially if you find something that could raise questions later.
The goal here is to document what you see exactly as it is. If an item or area isn’t in perfect condition, describe it accurately instead of assuming it’s fine. This honest record protects both sides — tenants, owners, or businesses — from disagreements or false claims in the future.
A careful condition check takes a bit of extra time but builds trust and keeps your records accurate from day one.
4. Documentation
Once verification and condition checks are complete, it’s time to record everything clearly. Documentation is what turns your observations into an official record that can be referred to later.
Start by listing each item, room, or area along with key details such as quantity, model, or description. Note the condition of every item and include short comments where needed. If something is missing, damaged, or not working, describe it clearly.
For goods or equipment, record product codes, serial numbers, and conditions in your inventory sheet or software. Attach any photos taken during inspection to provide visual proof.
For property check-ins, document each room in order. Include details about walls, floors, furniture, and fixtures. Add photographs to support the written notes and make sure they’re clear and dated.
Many teams now prefer using digital tools or mobile apps for documentation. They make it easier to upload photos, mark checklists, and sync data automatically. This reduces manual work and helps avoid misplaced or incomplete records.
Good documentation is more than a formality. It’s a detailed snapshot of what you received and what shape it was in at that exact moment. When issues arise later, this record becomes your most reliable source of truth.
5. Approval and Sign-Off
After all details are recorded, the next step is to confirm and approve the information. This step adds accountability and ensures everyone involved agrees with what has been checked and documented.
For property check-ins, both the landlord or agent and the tenant review the inventory report together. The tenant is given time to check the details, add notes if needed, and then sign the document to confirm that everything matches the actual condition of the property. This signed report becomes an important reference if any disagreements arise later.
For business or warehouse check-ins, a supervisor, manager, or department head reviews the inspection results. They check that quantities, conditions, and notes are accurate before signing off. This confirmation helps avoid disputes between departments or with suppliers.
It’s also a good practice to include a digital signature or approval record if you’re using software. It keeps everything traceable and easy to store.
Approval and sign-off may seem like a small step, but it adds an essential layer of validation. Once both sides agree, the record officially becomes part of your inventory history.
6. System Update
Once the check-in details are approved, it’s time to record everything in your inventory or property management system. This step keeps your digital records consistent with what’s been checked in physically.
For business inventory, update your system with the correct quantities, serial numbers, and item conditions. This ensures that your stock levels are accurate and ready for future use, audits, or reports. If your team uses asset management software, upload supporting documents and photos directly to each item record for easy reference later.
For property check-ins, upload the completed inventory report, photos, and signed approvals into your property management system or shared storage. This makes it easy to access during check-outs or future inspections.
Keeping your system updated right after check-in prevents data gaps and confusion later. It also helps other departments — such as finance, operations, or maintenance — work with the latest and most reliable information.
The goal is to make sure that what’s in your records truly reflects what exists in real life. When your system stays accurate, you can make decisions faster and trust the information you see.
7. Final Confirmation
The last step in the check-in process is to review everything one more time before closing the record. This final confirmation ensures that all details are correct and complete.
Go through your documentation, photos, and system entries carefully. Check that every item, quantity, and condition note has been recorded. Make sure signatures or approvals are attached and stored properly. If you’re using digital tools, confirm that all files have synced and are saved in the right location.
For business inventory, this step might include confirming that all items are stored in the correct place and labeled for easy tracking. For property check-ins, it means reviewing the full report to confirm that every room, fixture, and key has been accounted for.
Once everything is verified, mark the check-in as complete. The items or property are now officially logged and ready for use, storage, or handover.
Final confirmation may feel like a small step, but it’s the one that gives you full confidence in your records. It closes the loop and ensures that your inventory data is accurate, organized, and ready for future reference.
Inventory Check-In for Property Management
In property management, an inventory check-in is one of the most important steps before a tenant moves in. It creates a clear record of the property’s condition and contents, helping to prevent disagreements when the tenancy ends.
The process starts with a detailed inspection of every part of the property. The agent or landlord walks through each room and records what’s inside — from furniture and fixtures to flooring and walls. Notes are taken on the condition of each item, and any existing marks, scuffs, or damage are described in detail.
High-quality photographs are then taken to support the written notes. These photos show exactly how the property looked at the time of move-in, providing visual evidence if questions come up later.
Next, the check-in report includes several key details:
- Condition descriptions for all furniture, appliances, and fixtures.
- Cleanliness level for each room.
- Appliance and fixture checks to confirm everything works properly.
- Meter readings for gas, water, and electricity, often with photos for proof.
- Keys and locks information, including the number of keys handed over and the state of each lock.
Once the report is complete, the tenant reviews it carefully. They can add comments if they notice anything different. After both parties agree, the report is signed and dated, confirming that it accurately reflects the property’s condition at the start of the tenancy.
This record protects both the landlord and the tenant. If damage or missing items are found later, everyone can refer back to the check-in report for clarity.
A good property check-in is detailed, organized, and fair. It ensures transparency, builds trust, and keeps the entire tenancy process smooth from the very beginning.
Inventory Check-In for Businesses (Receiving Goods or Assets)
In a business setting, inventory check-in happens whenever goods, materials, or equipment are received. It’s a key step that ensures everything delivered matches what was ordered and is in good condition before being stored or used.
The process begins when a shipment arrives. Each box or item is compared against the purchase order or delivery note to confirm that the right products, quantities, and models have been received. This verification step helps identify missing or incorrect items early, before they cause issues in production or daily operations.
Next comes the inspection stage. Every item is checked for physical damage, packaging issues, or other defects. If a product is damaged or doesn’t meet quality standards, it should be reported immediately to the supplier. Taking photos during this step provides visual proof that supports any claims or follow-ups.
Once everything is verified and inspected, the details are recorded in the company’s inventory or asset management system. Each entry typically includes item names, serial numbers, quantities, and conditions. Many teams now use digital tools or barcode scanners to speed up this process and reduce typing errors.
After documentation, items are stored or assigned. Goods are placed in their proper storage areas, labeled clearly, or distributed to the departments or employees who need them. For IT or office assets, this might mean assigning laptops or devices to staff and recording who they belong to.
Finally, the check-in is confirmed and approved by a manager or team lead. This confirms that all details are accurate and complete. The inventory system is then updated, ensuring real-time visibility of all available assets or stock.
A well-managed business check-in process keeps operations organized and prevents inventory confusion. It ensures that what’s in your system matches what’s on your shelves — saving time, reducing losses, and improving overall control of company resources.
Tools and Technologies That Simplify Check-In
Technology plays a big role in making the check-in process faster and more accurate. Instead of relying on paper forms and manual updates, digital tools help record, track, and organize information in real time.
Here are some of the most common technologies used today:
1. Barcode and QR Code Scanning
Barcodes and QR codes are simple but effective tools for identifying and tracking items. Each tag carries unique information that can be scanned instantly with a mobile device or handheld scanner. This makes it easy to record items, reduce typing errors, and speed up the check-in process.
2. RFID (Radio Frequency Identification)
RFID tags take automation a step further. They allow multiple items to be scanned at once, even if they’re not directly visible. This is especially useful in warehouses or large facilities where counting each item manually would take too much time. RFID systems also update records automatically, improving accuracy and efficiency.
3. Mobile Apps and Tablets
Many teams now use mobile apps to handle check-ins directly from the field or warehouse floor. These apps make it possible to take photos, scan barcodes, and update records immediately. They also sync with cloud systems, so data is stored safely and can be accessed from anywhere.
4. Asset and Inventory Management Software
A central software platform keeps everything connected. It stores all records, updates stock levels automatically, and allows managers to see what’s available at any moment. These systems often integrate with other tools like procurement, maintenance, or accounting, creating a complete picture of asset movement.
Read also: Best Inventory Management Software: Essential Features to Look for
5. Cloud Storage and Automation
Cloud systems ensure that reports, photos, and approvals are never lost. Automated workflows can send alerts when stock is received, approved, or needs attention. This reduces manual work and keeps teams updated in real time.
Using technology doesn’t just make check-in easier — it keeps data accurate and accessible. When tools are connected, every item received becomes part of a clear and traceable record, helping teams stay organized and confident in their inventory.
Conclusion
Inventory check-in may seem like a routine task, but it’s one of the most important parts of managing assets or properties. It creates the foundation for accurate records, fair evaluations, and smooth operations later on.
When every item or property is properly inspected, documented, and approved, it becomes easier to spot issues early, prevent disputes, and maintain trust between everyone involved. The process also helps businesses and property managers save time and reduce errors by keeping all data consistent from day one.
The key is structure and consistency. Following clear steps, using digital tools, and updating records right after check-in ensures that what’s on file truly reflects what exists in real life.
In both property management and business environments, good check-in practices make all the difference. They protect assets, strengthen accountability, and give you confidence that your inventory is accurate, organized, and ready for whatever comes next.

Related Blogs
Subscribe for Expert Tips and Updates
Receive the latest news from AssetLoom, right in your inbox.


